 chenjunjie
190f09501c
chenjunjie
190f09501c
Reviewed-by: Liudmila Denisova <ldenisov@noreply.gitea.eco.tsi-dev.otc-service.com>
Co-authored-by: chenjunjie <chenjunjie@huawei.com>
Co-committed-by: chenjunjie <chenjunjie@huawei.com>
16 KiB
Accessing Kafka in a Public Network Using DNAT
Enable public access in either of the following ways:
- On the Kafka console, access Kafka instances using EIPs. For details, see Configuring Kafka Public Access.
- Configure port mapping from EIPs to specified instance ports using destination NAT (DNAT).
This section describes how to access Kafka over a public network using DNAT.
Prerequisites
You have created EIPs. The number of EIPs is the same as the number of brokers in the Kafka instance. For details about how to create an EIP, see Assigning an EIP.
Step 1: Obtain Information About the Kafka Instance
- Log in to the console.
- Click
 in the upper left corner to select the region where your instance is located.
 - Click Service List and choose Application > Distributed Message Service. The Kafka instance list is displayed.
- Click the desired instance to go to the instance details page.
- In the Connection area on the Basic Information page, view and record the private network access addresses of the Kafka instance. In the Network area, view and record the VPC and subnet where the Kafka instance is located.Figure 1 Kafka instance information


Step 2: Create a Public NAT Gateway
- Click Service List and choose Network > NAT Gateway.
- Click Create Public NAT Gateway.
- Set parameters by referring to Table 1 and other parameters as required. For details, see Creating a Public NAT Gateway.Figure 2 Create Public NAT Gateway

Table 1 Public NAT gateway creation parameters Parameter
Description
Region
Region where the public NAT gateway is located. Select the region that the Kafka instance is in.
Name
Enter a name for the public NAT gateway. Enter up to 64 characters. Only letters, digits, underscores (_), hyphens (-), and periods (.) are allowed.
VPC
VPC where the public NAT gateway resides. Select the VPC recorded in 5.
Subnet
Subnet in the VPC where the public NAT gateway resides. Select the subnet recorded in 5.
- Click Create Now.
- Confirm the specifications and click Submit.

Step 3: Add a DNAT Rule
- On Public NAT Gateways page, locate the row containing the newly created public NAT gateway and click Add Rule in the Operation column.
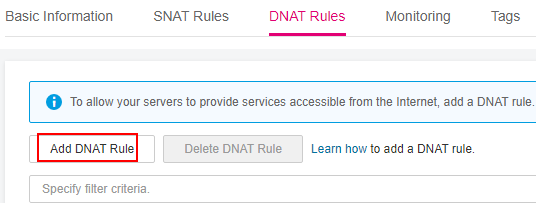
- On the DNAT Rules tab page, click Add DNAT Rule.Figure 3 Public NAT gateway details
- Set parameters by referring to Table 2. For details about more parameters, see Adding a DNAT Rule.Figure 4 Adding a DNAT rule

Table 2 Adding a DNAT rule Parameter
Description
Scenario
Select VPC. The servers in a VPC will share an EIP to provide services accessible from the Internet through the DNAT rule.
Port Type
Select Specific port. The public NAT gateway forwards requests to your servers only from the outside port and to the inside port configured here, and only if they use the right protocol.
Protocol
Select TCP.
EIP
Select the created EIP.
Outside Port
Enter 9011.
Instance Type
Instance type for providing services over external public networks. Select Custom.
Private IP Address
Enter one of the private network addresses of the Kafka instance recorded in 5.
Inside Port
Enter 9011.
- Click OK.
View the DNAT rule status in the DNAT rule list. If Status is Running, the rule has been added successfully.
- Create DNAT rules for other private network addresses of the Kafka instance recorded in 5. Configure a unique EIP for each DNAT rule.
- After all DNAT rules are created, click the DNAT Rules tab to view the created DNAT rules and record the EIPs corresponding to the private IP addresses.


Step 4: Map EIPs to the Port 9011 of Private IP Addresses
- Click Service List and choose Application > Distributed Message Service. The Kafka instance list is displayed.
- Click the desired Kafka instance to view its details.
- In the Advanced Settings area on the Basic Information page, click Modify.
- Change the values of advertised.listeners IP Address/Domain Name to the EIPs in the DNAT rules. Ensure that the mapping between the private network addresses and the EIPs is consistent with that recorded in 6. Then click Save.

Step 5: Verify Connectivity
Check whether messages can be created and retrieved by referring to Connecting to Kafka Using the Client (Plaintext Access) or Connecting to Kafka Using the Client (Ciphertext Access).
Notes:
- The address for connecting to a Kafka instance is in the format of "advertised.listeners IP:9011". For example, the addresses for connecting to the Kafka instance shown in Figure 5 are 100.xxx.xxx.20:9011,100.xxx.xxx.21:9011,100.xxx.xxx.23:9011.
- Configure security group rules for the Kafka instance to allow inbound access over port 9011.
- Public access must be enabled on the client connected to the Kafka instance.