 wanghuijuan738
8f01f116a5
wanghuijuan738
8f01f116a5
Reviewed-by: Pristromskaia, Margarita <margarita.pristromskaia@t-systems.com>
Co-authored-by: wanghuijuan738 <wanghuijuan738@huawei.com>
Co-committed-by: wanghuijuan738 <wanghuijuan738@huawei.com>
6.3 KiB
Attaching a Disk to an ECS
Scenarios
If the existing disks of an ECS fail to meet service requirements, for example, due to insufficient disk space or poor disk performance, you can attach more available EVS disks to the ECS, or create more disks (choosing Storage > Elastic Volume Service) and attach them to the ECS.
When attaching EVS disks to an existing ECS, their billing modes can be different from the ECS billing mode. You can select appropriate billing modes for these EVS disks based on your requirements.
Prerequisites
Procedure
- Log in to the management console.
- Click
 in the upper left corner and select a region and project.
 - Under Computing, click Elastic Cloud Server.
- In the search box above the ECS list, enter the ECS name, IP address, or ID for search.
- Click the name of the target ECS.
The ECS details page is displayed.
- Click the Disks tab. Then, click Attach Disk.
The Attach Disk dialog box is displayed.
Figure 1 Attach Disk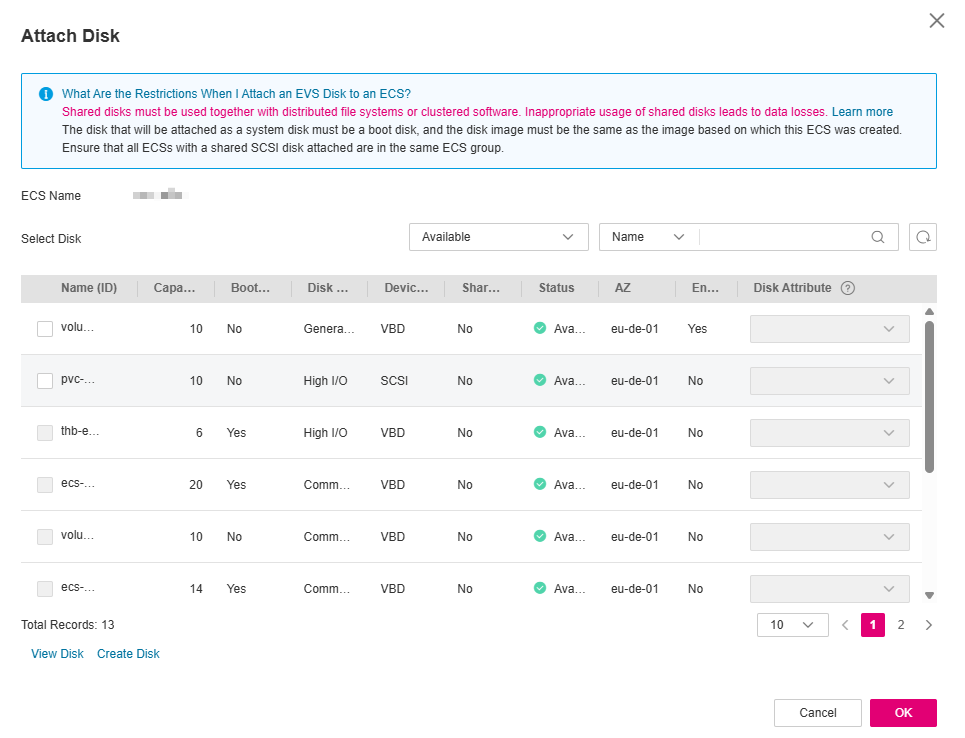
- Select the target disk and specify the disk as the system disk or data disk.

- If no EVS disks are available, click Create Disk in the lower part of the list.
- For details about constraints on attaching disks, see What Are the Requirements for Attaching an EVS Disk to an ECS?
- The device names for the local disks and EVS disks attached to a disk-intensive ECS comply with the following rules:
- System disk: Use sda or vda.
- Local disk: Use the device name following sda or vda in alphabetical order.
- EVS disk: Use the device name added in alphabetical order following those used by local disks.
- Click OK.
After the disk is attached, you can view the information about it on the Disks tab.
Figure 2 Viewing the newly attached disk


Follow-up Procedure
If the attached disk is newly created, the disk cannot be used until it is initialized.
For details about how to initialize a data disk, see Scenarios and Disk Partitions.